Growing mushrooms indoors
Maybe you enjoy using fresh mushrooms in your meal preparations but have opened the refrigerator door and discovered to your disappointment the “mush” part of mushrooms. Or maybe you’d like something different to satisfy your inner gardener over the winter months (or any other time of year, for that matter). Whatever the reason, growing mushrooms indoors is a fun project with tasty results.
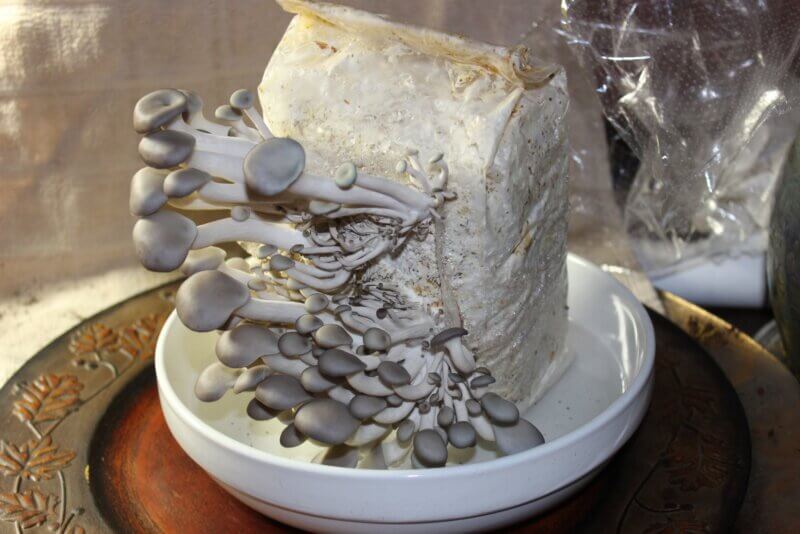
Mushroom grow kits can be found online and in the gardening section in many stores. Available varieties include oyster, lion’s mane and shitake, along with familiar varieties such as white button and portabella.
The growing process is simple. The hardest part may be deciding what variety to grow. And while growing mushrooms at home using a kit is easy, failures do happen, so you may want to check to see if your kit comes with a guarantee it will grow before making a decision.

The kit you choose will likely include a block or log that’s been inoculated with mushroom spawn, a moisture-retaining cover or a small misting bottle and instructions. Be sure to review the specific instructions for your kit since these will vary from manufacturer to manufacturer.
Your second step, after reviewing those all-important instructions, is to remove the growing block from its box. But do not remove its plastic wrapping. Make an “X” on one side of the plastic and moisten the block according to the manufacturer’s instructions.
Some kits will require soaking the block in water. Others call for a dish of water to set the block in. Add the moisture-retaining cover, if appropriate, and place in indirect light, such as to the side of a north-facing window.
Next comes the hard part. Waiting. It will take about a week or so for anything to happen. Just continue to follow the instructions provided with your kit for the care of the mushroom block. This may include misting once to several times a day or adjusting the moisture cover to maintain proper humidity.
Just when you think nothing is going to happen, surprise! Mushrooms begin to “pin,” and you’ll see small bumps appear. From that point on, they will grow rapidly over the next couple of weeks.
You can begin harvesting when they reach the desired size by cutting the stem with sharp scissors or a knife. Several stages of growth may be present at the same time. Just be sure to harvest your mushrooms before they pass their prime.
If you find you have more mushrooms than you can use, harvested mushrooms can be stored in a paper bag in the refrigerator for about a week. You also can dry them to preserve your harvest for more an extended period.
To dry mushrooms using a food dehydrator, slice the mushrooms thinly (about 1/4 inch). Place on the dehydrator’s tray, making sure the pieces don’t touch. Process at 110-120 degrees Fahrenheit for 4-8 hours, according to the dehydrator’s instructions, until the mushroom pieces are dry and leathery.
Time will vary depending on the size of the mushroom slices and the dehydrator you’re using. Store dehydrated mushrooms in an airtight container in a cool, dry place to enjoy them for up to a year.
Dried mushrooms can be a tasty addition when cooking. Rehydrate them in whatever liquid you are planning to use in your recipe by letting them soak for about 30 minutes. Or sprinkle in soup or stews to rehydrate during cooking.
(Deborah J. Benoit is a University of Vermont Extension master gardener from North Adams, Mass., who is part of Vermont’s Bennington County Chapter.)
Related Stories
Popular Stories
If you enjoy The Charlotte News, please consider making a donation. Your gift will help us produce more stories like this. The majority of our budget comes from charitable contributions. Your gift helps sustain The Charlotte News, keeping it a free service for everyone in town. Thank you.
Andrew Zehner, Board Chair


