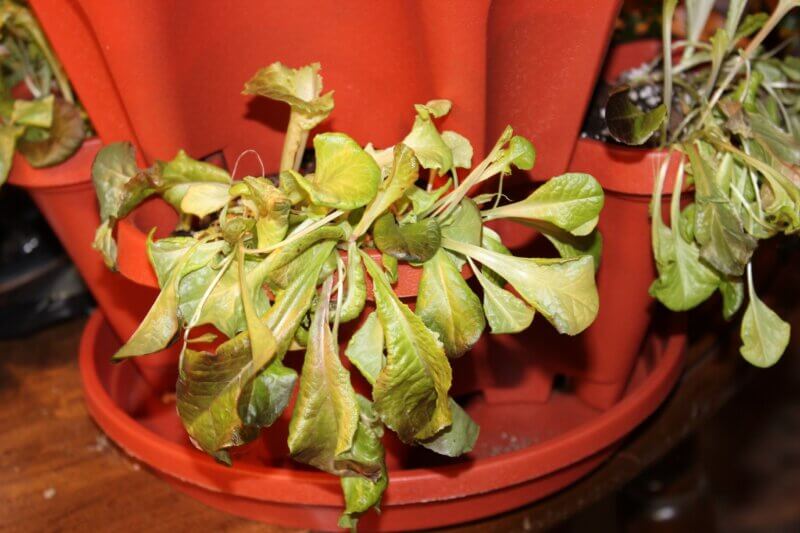
Growing greens in winter
There’s nothing like creating a salad of freshly harvested greens you’ve grown yourself from seed. The good news is, this is one crop you can grow year-round, indoors, safe from nibbling rabbits in fair weather and freezing temperatures in winter.
What type of greens do you fancy? Leafy lettuces? Deep green spinach? Spicy arugula?
There are so many possibilities. While you likely won’t find seeds for sale locally at this time of year, you can use seeds you already have or hop online to check out all the choices available from mail order catalogs.
Like any garden, location will play a major part in the success of your growing plans. You’ll need adequate light, suitable temperatures, an appropriate soil mix and water.
Since light is so important to promoting healthy growth, select a sunny spot directly in front of a south- or west-facing window. Just be sure the location is away from cold drafts from windows and doors, and hot drafts from radiators or woodstoves.
As an alternative, you can use grow lights, which are readily available in stores and online. You also can use a shop light using fluorescent tube bulbs. For more information on using grow lights, see https://go.uvm.edu/grow-lights.
Once you’ve selected a location, choose a container or containers for your garden of greens. If you’re growing in front of a window, a rectangular window-box shape is a good choice, but a selection of small pots can work as well.
Fill your containers with a light potting mix or seed starter that’s been moistened. Scatter seeds across the surface and cover lightly with soil according to directions on the seed packet. Use a spray bottle to water the seeds.
Add a clear cover to the container to help retain moisture. A plastic soda bottle with the bottom cut off will work well with round pots. Clear food-storage bags or food wrap also work well. If water begins to collect on the cover, vent it to allow the excess moisture to escape.
Once seedlings emerge, you can remove the cover. Be sure the soil doesn’t dry out, so water as needed. As the seedlings grow, thin to the spacing recommended on the seed package. The thinned seedlings make a good addition to salads or sandwiches while you’re waiting for the remaining plants to grow.
Provide 10-12 hours of light daily to encourage healthy growth. If you notice any of your seedlings growing leggy or becoming yellow, they are likely in need of more light. Adding a grow light can supplement natural light. Lowering a grow light closer to the foliage can help, as can extending the number of hours of light the plants receive.
When your plants reach several inches high, it’s time to harvest. Using sharp scissors, cut the outer leaves. By leaving the inner leaves, the plant will continue to grow for future harvesting.
You can extend your harvest further by succession planting. Instead of planting your entire crop of greens at once, initially plant only part. Every two or three weeks, plant more.
After your original planting has been completely harvested, replant that container. This way you will have greens in various stages of growth throughout the winter and early spring.
If you’d like to try growing something besides greens for your salad, consider radishes (Raphanus sativus). Check for varieties ready to harvest in as little as three weeks. Other possibilities include green pea shoots (Pisum sativum) and green onions (Allium fistulosum).
Whatever the weather outside, gardening indoors can be very tasty indeed.
(Deborah J. Benoit is a University of Vermont Extension master gardener from North Adams, Mass., who is part of the Bennington County Chapter.)
Related Stories


Popular Stories
If you enjoy The Charlotte News, please consider making a donation. Your gift will help us produce more stories like this. The majority of our budget comes from charitable contributions. Your gift helps sustain The Charlotte News, keeping it a free service for everyone in town. Thank you.
Andrew Zehner, Board Chair